 This is another fridge notepad made for a Chrismas Present. This Magnolia was from the Autumn club kit, sentiment from Faerie Song, the papers are DCWV and embelishments were LP Creative. More detail can be seen below.
Thanks for looking

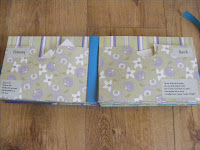
 This is another fridge notepad made for a Chrismas Present. This Magnolia was from the Autumn club kit, sentiment from Faerie Song, the papers are DCWV and embelishments were LP Creative. More detail can be seen below.


 I have been inspired by some lovelly little folders I've seen made to hold tea bags or a packet of seeds, so i wanted to have go myself. From the original idea though the finished result bares little resemblance but I am pleased with it, good thing too as it took ages! I hope my Mum will like it as its her Christmas present (I am safe to post this as she is not into blogs!) Above is the front cover.
There is a Pocket for each month, I have put in a few packets of seed to start it off.

This is a pocket inside the back cover to hold notes, cultivating instructions etc.

This show the whole this opened up :)
Thanks for looking
Emily

 I cut a piece of A4 chipboard in half lengthways
 I made a slit using a craft knife big enough for the back of the note pad to side into.
 I took an A4 piece of card and repeated both these steps on the card.


 I then stuck the two pieces of card to the two pieces of chipboard, lining up the slots on the front parts.
 The front can then be stuck to the back but I only stuck at the top and bottom to allow enough flexability to insert the notepad.
 This can now be decorated as desired and magnets glued to the back so it can stick to the fridge.
 I Know I have done the wrong year!!!! ARRGGGHHH it will be fixed!
 I am continuing on the Christmas presents today. I have

It has two magnets on the back so it can hang on the fridge.
Thanks for looking
Emily


 You should have 3 score lines across the width of your card, bit difficult to see in the picture (the help of a cat is optional)

 Push the ends parts so they fold in and the middle so it folds out like in the picture.


